Photoshop Basics For The Aspiring Photographer
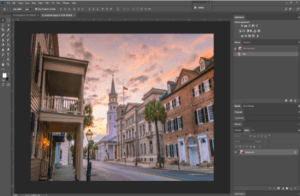
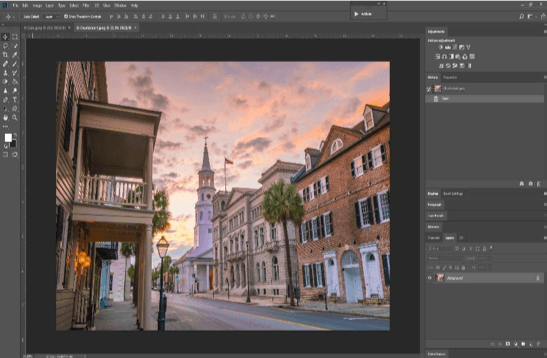
Whether you are an aspiring photographer or a natural light photographer who needs a little help with Photoshop, this article will cover some of the essential tools that are relatively easy to use but make a world of a difference. When it comes to Photoshop, it’s always best to have the latest version. Here you will see me working with Adobe Photoshop CC 2018™. To the right is what CC looks like when you open up a photo. It’s very important to remember that while Photoshop is a very useful tool, in some cases it is not necessary. You don’t want to end up with a blown out photo, or make your client look like they are made of plastic, so always be sure to err on the side of caution. So, let’s get to the most useful tools:
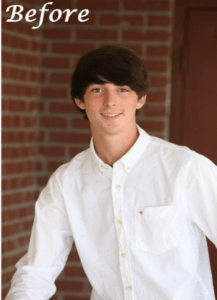
Spot Healing/Healing Brush
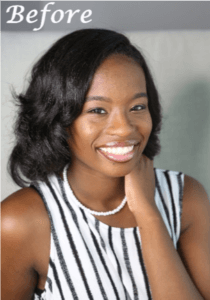
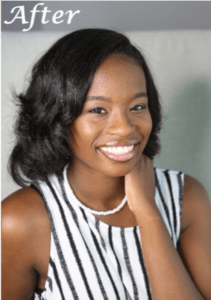
This tool is helpful in multiple ways, from acne on teenagers, bruises, scratch marks on newborns, stains on clothing, or just cleaning up a background. While the spot healer is helpful when it comes to stains and background clean up, the healing brush is going to be the most useful when working with clients. If you try to use the spot healer on a face with acne/scratches, you might end up making the affected area too soft and very plastic looking. With the healing brush, it will require you to pull a sample from an area you want to clone. Pick an area that isn’t too matted and dark, hold ALT, clone and replace the affected area. Make sure you pull from different areas as you don’t want to replicate the same pattern over and over again. Also be sure to leave some of the natural bumps and pores to keep your clients skin from looking too fake. In this before and after, you will see that I eliminated the big spots on the prominent cheek and T zone, but still left the more natural looking bumps on the forehead and chin. If you clone from a more matted area on her face, you will lose the natural shine she has on her cheek. You can control the size of your healing brush by using the [ key on the keyboard to make the circle smaller, and the ] key to make it larger. You will have to adjust the size to avoid cloning areas with blemishes, and to make sure you clone an area with the same light refraction.
Dodge Tool
The dodge tool is essentially a lightening tool. The most useful application for this tool is when you want to whiten teeth, brighten eyes, and to reduce shadows. Just like any Photoshop tool, you need to be careful with using this tool and where you apply it. You can make this tool bigger and smaller with the same keys stated above for the healing brush. Keep in mind it should only take a couple swipes across the teeth to do the job sufficiently. When using it to brighten eyes, avoid the pupil and any reflection of light that might be in the iris. Below is an example of using the tool to whiten teeth.
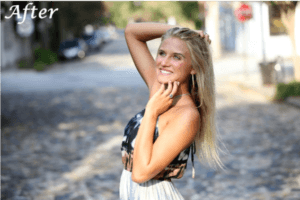
Actions
Actions are essentially a series of adjustments for the photos that do a variety of different things, depending on what you want. Whether you want the photo to be in black and white, you need more fill light, you want the photo to be sharper, or you just want to mess with the brightness and contrast, actions are a simple way to accomplish any of your needs. The best part of actions is that you don’t have to be an expert in creating layers or messing with the levels in order to use them. The bad part about actions is that you need to purchase most of them, so if you’re a freelance photographer, this may not be in your budget. If you do any natural light photography however, I would recommend investing in a few.

Above and below you will see examples of actions and how they pair with natural light photography. In the before and after above, I ended up using Deep Crisp Details + Make Me Rich to make the photo a little less foggy, sharper, and with more contrast. This same look can be combined with time and effort, but when you have multiple clients waiting on photos, just throwing an action or two on the photo can be the most effective way to get it done and have it look amazing. All of the actions are pretty self-explanatory in their description, so it’s just a matter of figuring out what you want to change about the photo, then finding the best action for the job. Below you will see that the difference isn’t incredibly obvious, but more subtle and the colors are a bit deeper. This action is just Make Me Rich.
When working with Photoshop, sometimes the best option is less is more. If you do too much, make the skin look like plastic, make the teeth too white, or even blow out the photo using the wrong action or series of edits, the client won’t be happy because that’s not what they look like. There is a difference between editing the photo itself and editing the person, and it’s very important to keep that in mind. Using these simple tools and subtle ways of applying their effects will help you keep your sanity and keep your clients happy with the work you provide them.